

Get started
Initial Configuration
After installing the Multi-Platform Stock Sync (MPSS) plugin, you'll need to configure it to work with your specific setup. This guide will walk you through the initial configuration process.
Accessing MPSS Settings
- Log in to your WordPress admin panel.
- In the left sidebar, click on "Stock Sync".
- You'll see three main tabs: Platforms Settings, Cronjob Settings, and Change Log.
Platforms Settings
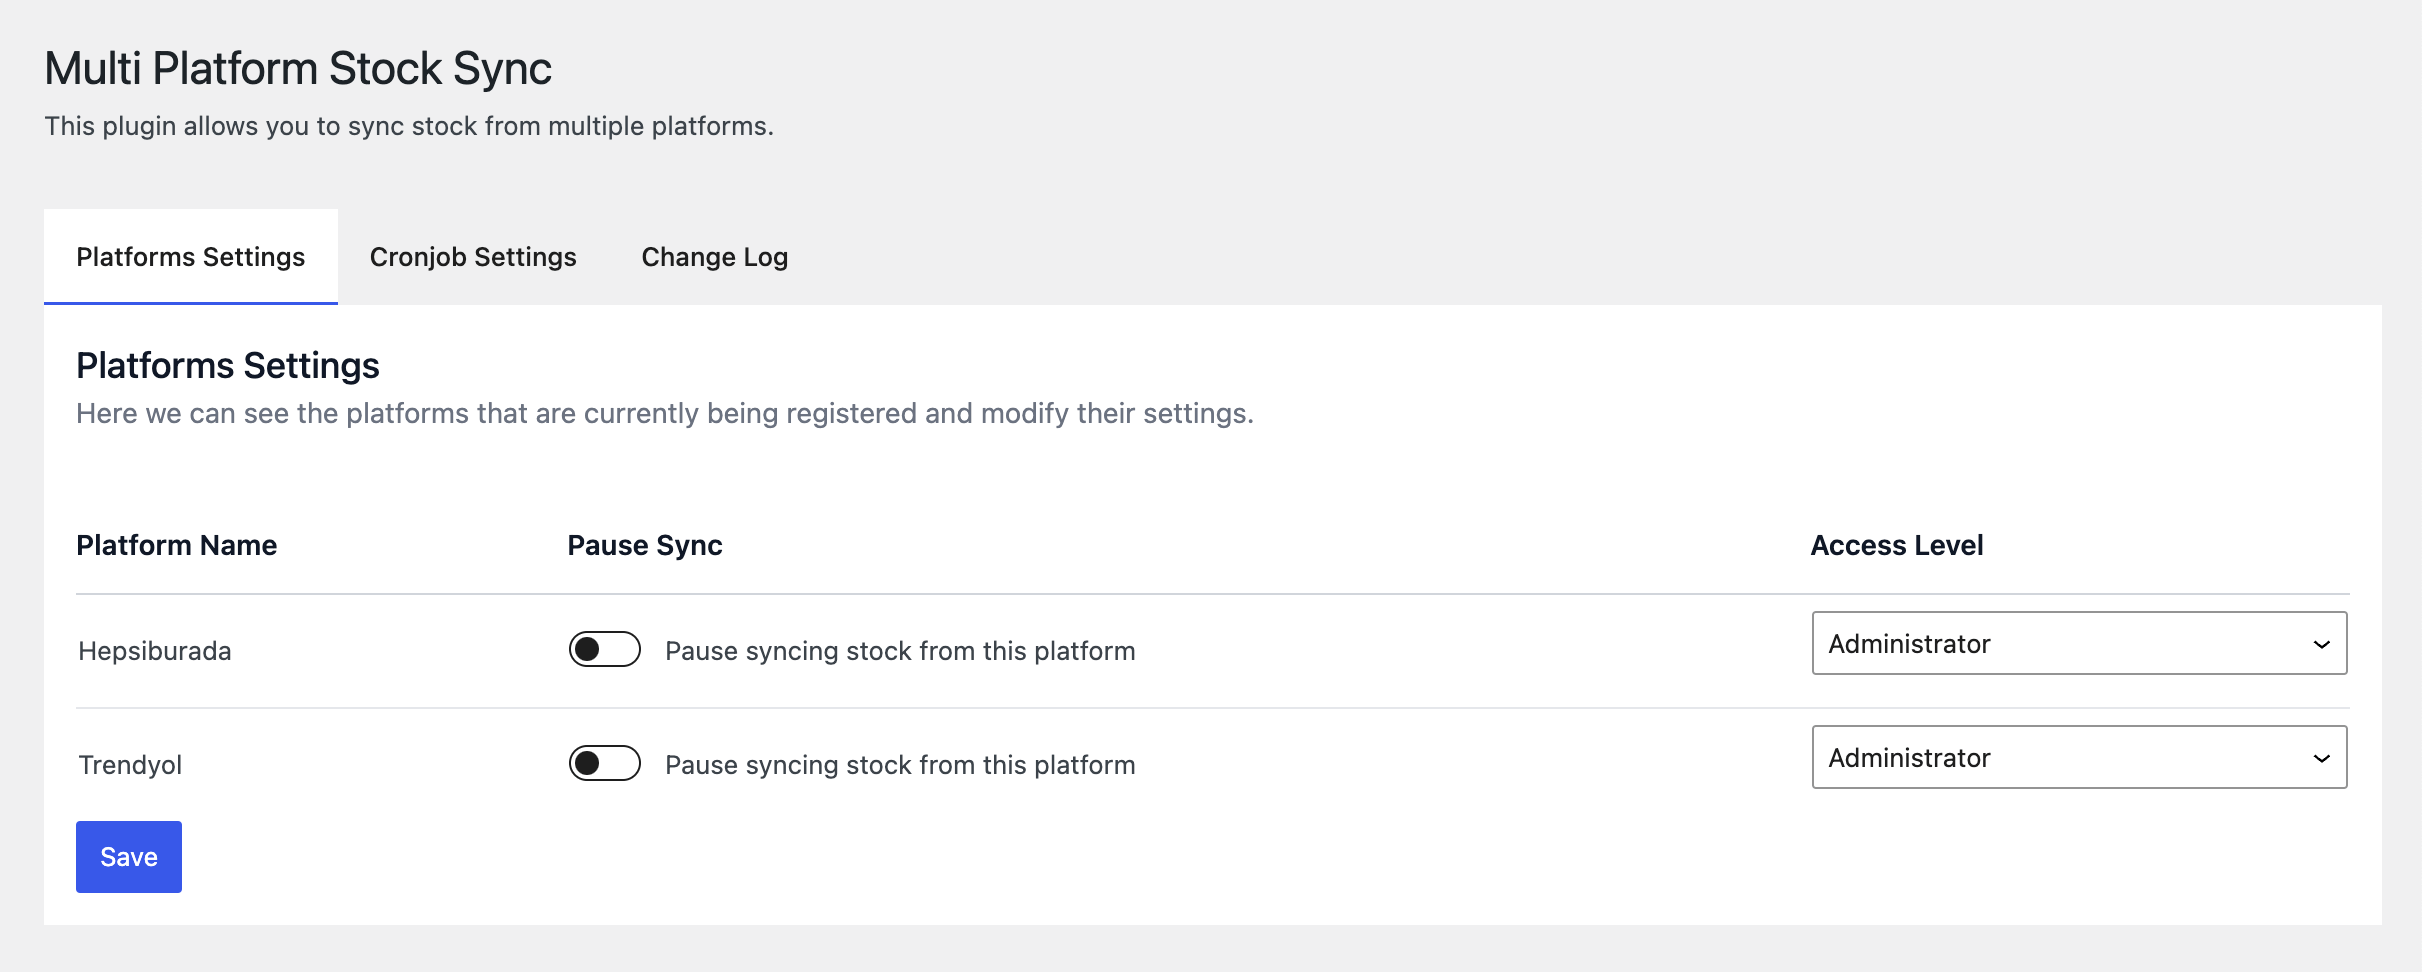
This tab allows you to manage the e-commerce platforms integrated with MPSS.
View Registered Platforms: Here, you'll see a list of all platforms that have registered themselves with MPSS.
Sync Control:
- For each platform, you can pause or resume the sync operation.
- Use the toggle switch next to each platform to control its sync status.
User Access Control:
- Set which user roles can access the features of each platform.
- Under the "Access Level" column you can easily modify these settings.
Cronjob Settings

This tab lets you configure the automated synchronization process.
Sync Interval:
- Set how often MPSS should run the sync process.
- Options typically include 5m, 15m, 30m, 1h, 2h, 6h, 12h, 24h.
- Select the interval that best suits your business needs.
- Turn off syncing by choosing "Turn off" from the options list.
Email Alerts:
- Configure email notifications for sync events.
- Enable/disable alerts for:
- When a sync operation starts.
- When a sync operation ends.
- When an error occurs during sync.
Change Log
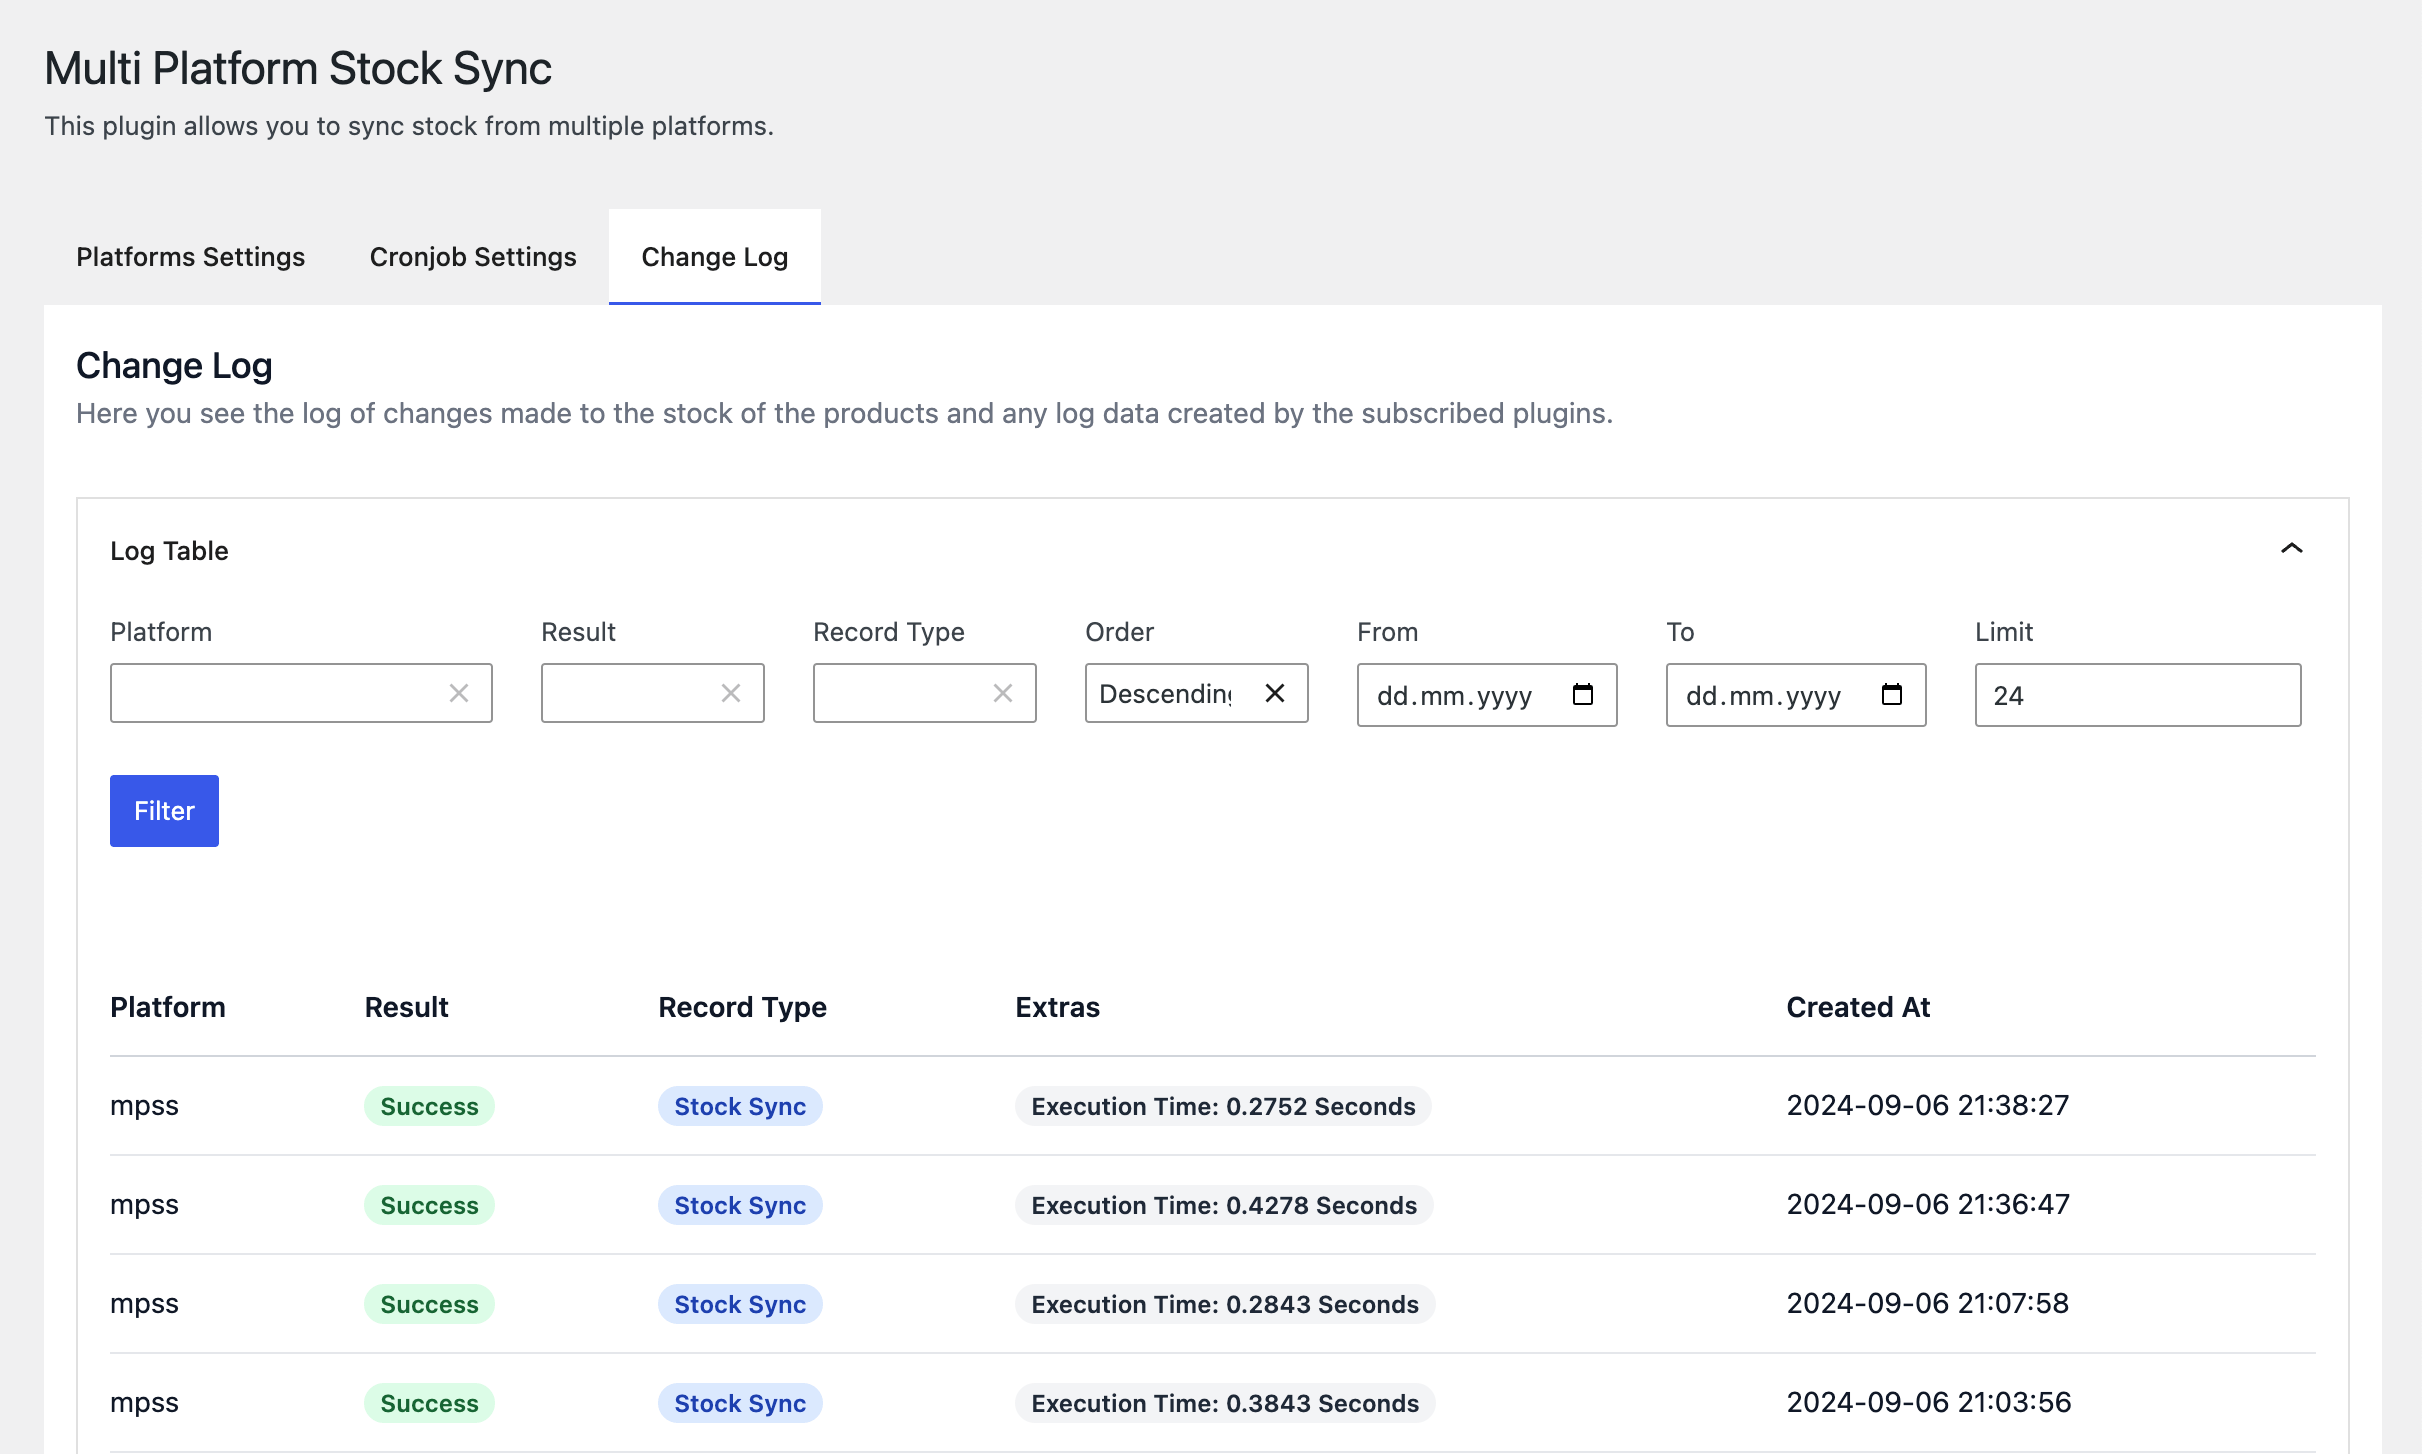
This tab provides a detailed log of all sync operations and allows you to manage this data.
View Sync History:
- See a comprehensive log of all previous sync operations.
Filtering Options:
- Filter log entries by:
- Platform Name
- Operation Result (e.g., success, failure)
- Operation Type (e.g., stock update, product sync)
- Operation Date
- Filter log entries by:
Log Retention:
- Toggle the option to delete or retain the change log upon plugin uninstallation.
- This setting helps manage data cleanup when removing the plugin.

- Log Analysis:
- Use this log to track sync performance, identify patterns, and troubleshoot issues.
- We log how much time did every sync operation needed, this helps you estimate
Saving Your Configuration
After adjusting settings in each tab:
- Click the "Save Changes" button at the bottom of each settings page.
- You should see a confirmation message that your settings have been saved.
Next Steps
After completing the initial configuration:
- Test the sync process by making a small inventory change in one platform.
- Check that the change is reflected in other connected platforms.
- Review the sync logs in the Change Log tab to ensure everything is working as expected.
If you encounter any issues or have questions, please consult our FAQ